These simple pull on pants feature a comfortable cut and elastic waist. These pants can be sewn up in girly fabrics or fabrics suitable for boys. Add pockets or ruffles to make them your own. Adjust the length to make them in to shorts or capris length. I am sure you will enjoy making this fast and easy wardrobe basic for little ones in your life!
Fabrics and Materials Needed:
1.5 yards of fabric (cotton, linen, corduroy, cotton knits, denim, etc)
1 yard of ¾ inch wide non-roll elastic
Thread
An iron
A seam gauge or ruler
2 safety pins (or an elastic threading tool)
Pant pattern downloaded from www.itseweasytv.com
Directions
Step 1: Download and cut out pattern from www.itseweasytv.com and print out pattern. If using a home printer, you will need to tile and assemble the pattern. Alternatively, you can take the file in to a print show that can print on wide-format paper and have them print out the full scale pattern for you.
Step 2: Fold your fabric in half lengthwise so that it is double layered. Pin the pattern pieces to the fabric and cut them out. You should have two pieces for the pant front and two pieces for the pant back.
Step 3: With right sides facing, pin the pant front piece together along the front (crotch) seam. Sew this seam using a ½ inch seam allowance. Serge or zigzag the raw edge of this seam.
Step 4: With right sides facing, pin the pant back pieces together along the back (crotch) seam. Sew this seam using a ½ inch seam allowance. Serge or zigzag the raw edge of this seam.
Step 5: With right sides facing, pin the pant front from step 3 to the pant back from step 4 along the side seams. Sew these two side seams using a ½ inch seam allowance. Serge or zigzag the raw edge of these side seams.
Step 6: With right sides facing, pin the pant front to the pant back along the leg inseam, matching up the center seams and the bottom edges. Sew this seam using a ½ inch seam allowance and serge or zigzag the raw edge.
Step 7: With the pants wrong side facing out, fold the top edge over 1 inch to form the waistline casing. Iron this in place. Fold the raw edge up ¼ inch to create a clean edge. Iron this in place. Place a few pins along this folded under seam to hold it in place with you stitch it down.
Step 8: Top stitch this in place, leaving 1 inch opening for inserting the elastic.
Step 9: Measure the child’s waist. Cut a piece of ¾ inch non-roll elastic 1-inch shorter than the waist. Place a large safety pin on both ends of the elastic. Thread one end through the casing until you reach the other side of the opening. Pull through and stitch the elastic closed using a lap stitch.
Step 10: Top stitch the opening closed. Stitch a tag or piece of elastic at the center back waistband to designate the pant back.
Step 11: Fold the bottom hems up 1 inch. Iron in place. Fold the raw edge under ½ inches. Press again. Stitch the hem in place with a straight or decorative stitch.
Step 12: Give the pants to the little one in your life to enjoy!
For more information visit www.shereesalchemydesigns.com
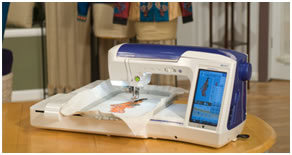
Featured sewing machine in this segment:
Sewing Machine Featured in this Segment:
Quattro 2 – 6700D - Sewing, Quilting, Crafting and Embroidery
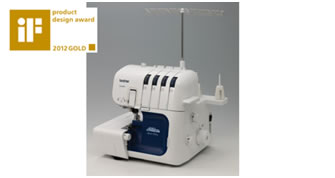
Sewing Machine Featured in this Segment:
5234 PRW Project Runway Limited Edition Serger
 |