SILK RIBBON EMBROIDERY- BOBBINWORK
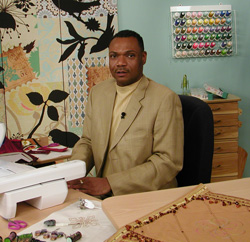
Created by Louis Carney
Take your embroidery to the next level! Outline designs can be made even more interesting by using a heavy thread, silk ribbon or even yarn in the bobbin and embroider upside down! There are even special embroidery designs made for bobbinwork. A beautiful texture is created and enhances the embroidery. Use your machines decorative stitches to embellish your favorite patterns- the Star stitch is perfect to mimic
flowers!
SUPPLIES:
Embroidery and construction threads
Silk Ribbon, yarns or heavy decorative threads (ribbon should be no wider than 4mm) I recommend Kreinik’s Ombre threads
Tear away stabilizer
Temporary adhesive spray
#90 topstitch needle
3-4 empty bobbins
Open-continuous line type embroidery designs- There are specific embroidery designs made for bobbin work, or you can use some of the quilting designs that are available for quilting in the hoop.
Extra bobbin case- this case is optional for All machines (never adjust the tension on the bobbin case that comes with your machine) Tip: It will be helpful to mark this case with a permanent marker of finger nail polish to distinguish it from the bobbin case that came with your machine.
Scrap fabric to test tension
Optional: Embroidery Software to adjust stitch length of desired design- For bobbin work I recommend a 2.5-3.00 mm stitch length per stitch for even stitch consistency
GETTING STARTED:
TIP: Always test the design and/or stitches on scrap fabric before using on actual project.
Wind at least 3 bobbins with silk ribbon. I wound the bobbins as if the ribbon were thread- using the normal thread guides and tension disk. You may need to restart your bobbin winder several times, as the ribbon will pull as it is going through the tension disk.
It is important to maintain even tension on the ribbon as it is winding, which is why I prefer to wind them using the machine versus hand winding.
Test the bobbin tension in the extra bobbin case by putting a filled bobbin in the case and pulling the ribbon. There should be little to no resistance for proper tension. It may be necessary to override the bobbin tension by bypassing the tension slit altogether. If necessary, loosen the tension screw (consult machine manual).
Replace the regular bobbin case with the extra bobbin case (refer to machine manual)
You should also disengage the automatic thread cutter feature (refer to machine manual)
Tighten the needle tension to 4.0 to start (you may need to adjust during testing)
Hoop a scrap piece of fabric, right side down and spray adhere a piece of stabilizer to the top (which is the wrong side of the fabric and should be facing up)
DO NOT USE THE AUTOMATIC EMBROIDERY FEATURE i.e. the start/stop button, as you may need to stop the machine instantly.
HINT: Some embroidery designs take a stitch in the center before advancing to the first stitch of the design- makes sure the needle is in the first stitch of the design, not just the center of the hoop
Pull the ribbon/thread to the top through all the layers by using the handwheel and taking one stitch. Take a few stitches and then trim the needle and bobbin thread from the first stitch.
Using the foot control, embroider design- you only need to embroider part of the design to test the tension.
Once you have satisfactory tension (there should be little to no needle thread on the right side and if using a ribbon, it should lay flat), you’re ready to move on to your project.
EMBROIDERY:
TIP: It may be helpful to print templates of the embroidery designs for perfect placement- don’t forget you are embroidering upside down.
Now that the tensions have been tested, you’re ready to embroider on the actual project.
Hoop your project, right side down. The wrong side of the fabric should be facing up
Advance the design to the first stitch of the design and pull the ribbon up through all the layers.
Begin embroidering, using the foot control, at a moderate, even speed.
Continue until embroidery design is complete- you may need to replace the bobbin at some point during the design (don’t forget to pull the ribbon up through all the layers again).
Replace the adjusted bobbin case with your regular bobbin and bobbin case.
Add a complimentary design with regular embroidery threads, if so desired.
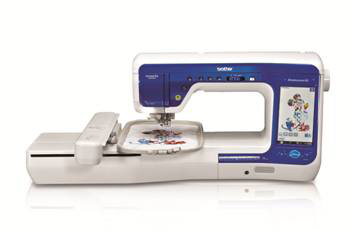
Remove any stabilizer and cut jump threads. Sewing Machine Featured in this Segment:
Innov-is VM6200D Dreamweaver XE
 |