Materials Needed
4, 15” by 17” Foam by Warm & Natural
Spray adhesive for foam
1 baby size package of Warm & Natural batting
3 yards muslin for cube liner
1 ½ yards fabric for cube slipcover**
2 packages Anti-Skid Gripper Fabric (Dritz)*
1 package Snap Tape (Dritz)*
Dritz Home Decorator’s Pins*
Thread to match fabric
*available from MoreSplashThanCash.com
**Fabric courtesy of Riley Blake Designs, “Serenata” by Samantha Walker
Use ½” seam allowance unless otherwise directed.
Foam Preparation
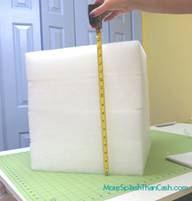
- Following manufacturer’s instructions, spray adhesive on foam pieces and evenly stack the 4 pieces on top of each other. Allow to dry.
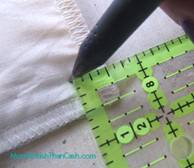
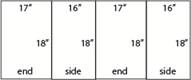
- Since the foam stack sides are slightly different lengths, measure each side and mark on foam appropriate measurements to identify (fig. 1).
Slipcover
- From the muslin and batting, cut the following pieces:
1, 16 ¼” by 17 ¼” rectangle (top)
2. 16 ¾” by 17 ¾” (sides)
1, 19 ½” by 17 ¾” rectangle (one end)
1, 8 ½” by 17 ¾” rectangle (other end)
- From the slipcover fabric, cut the following pieces:
1, 16 ¼” by 17 ¼” (top)
2, 17 ¼” by 20 ¾” (sides)
1, 10 ½” by 20 ¾” (one end)
1, 11 ½” by 20 ¾” (other end)
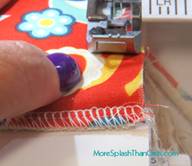
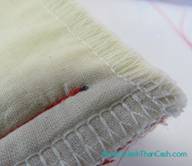
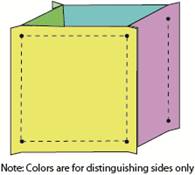
- Create a “fabric sandwich” by inserting the batting between the wrong sides of the slipcover and lining fabrics for the top and sides. Finish all edges by serging or zigzag stitching (fig 2).
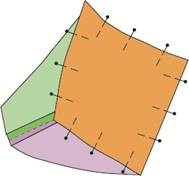
- With the remaining end pieces, and using fig. 3 as a guide, layer the fabrics. Finish the top and outside edges only. No need to finish the single layer of fabric as it will be turned under.
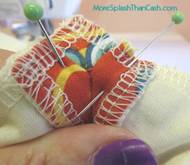
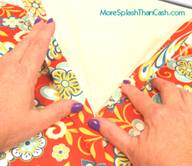
- Prepare the two end flaps by folding over and pressing a 1 ½” double hem on the single layer of the unit (figs. 4 and 5).
- Arrange the end flaps so the hem overlaps each other (fig. 6). Note the top and bottom position of the pieces. This is important for applying the snap tape correctly.
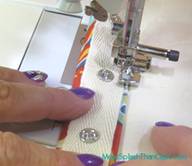
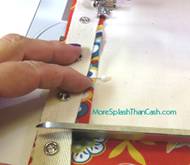
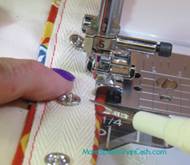
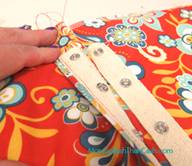
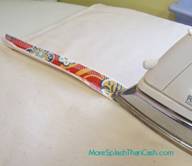
- Using a zipper foot, stitch one side the male side of the snap tape directly on the side hem area of the top end piece (fig. 7). Begin the tape 1 ½” from top edge. Trim any excess snap tape that extends into the bottom hem area (fig. 8). Then stitch along the opposite side of snap tape (fig. 9). Use an awl or seam ripper to make sure the tape does not scooch out of place (then the snaps won’t align). Repeat this process only this time stitch the female portion to the right side of the remaining flap but center it over the hem edge (fig 10).
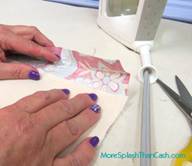
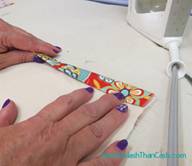
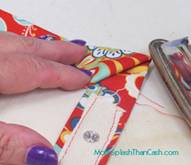
- Along the bottom edge of each flap unit, fold over and press a double 1 ½” hem. Then fold over and press one corner 45 degrees to form a miter (fig. 11). Do not stitch.
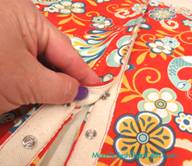
- Snap the two end pieces together and treat as one unit (fig. 12).
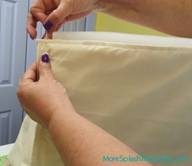
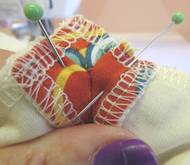
- Arrange the sides and end pieces around the foam base. Pin to fit (fig. 13).
- Remove cover from foam and stitch the pieces together. Mark a dot ½” in from each corner (fig. 14). Stitch from dot to dot, backstitching to secure (fig. 15). Press the seams open (fig. 16).
- Now stitch the top to the unit. At each corner, arrange the seam allowance as shown (fig. 17). Stitch one side at a time, starting and stopping at the edge of the folded seam allowance. This will result in a sharp corner.
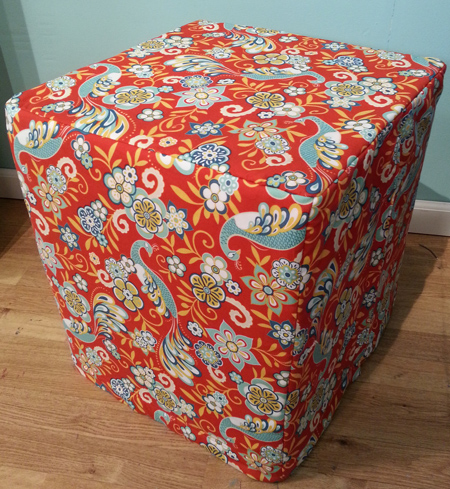
- Place the unit back on the foam and fold up the bottom hem (fig. 18). The bottom edge of the hem should just “kiss” the floor. Then fold under the raw edge to create a double hem. Stitch the hem in place. Place the finished slipcover over the foam cube and enjoy!
Cube Liner
- From the muslin cut the following pieces:
3, 16” by 17” rectangles (sides and top)
2, 18” by 17” rectangles (the 2 ends)
- From the gripper fabric cut 1, 16” by 17” rectangle (bottom)
- Arrange the sides and ends as in fig. 2. Referring to fig. 3, sew together the four sides, stopping and starting each seam at marked dots, ½” from corners. Press the seams open.
- Matching dots, sew the gripper fabric to one open end of pieced unit as directed above.
- On the remaining side, stitch the top to only one side of the piece unit (it should resemble an opened jack-in-the-box).
- Turn the muslin cover right side out and insert foam stack. The cover should fit snuggly.
- Hand stitch the remaining three sides closed. This doesn’t have to be neat or overly precise – no one will see it.
For more information
Donna@MoreSplashThanCash.com
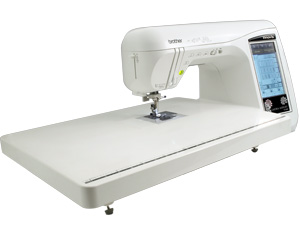
Sewing Machine Featured in this Segment:
Innov-ís NX2000 Laura Ashley® Limited Edition Sewing Machine
With Zig Zag “J” Foot and Zipper Foot
|