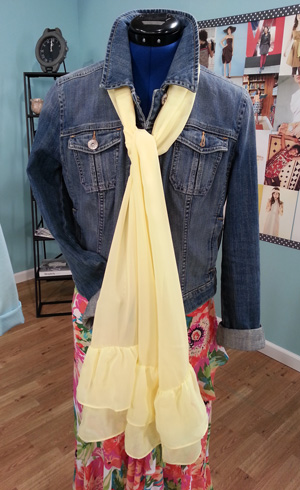 
Supplies:
- Polyester Chiffon, Silk Chiffon or light weight cotton voile:
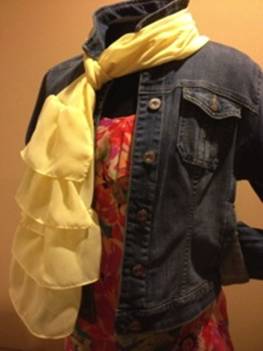
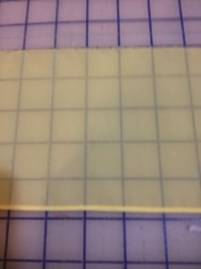
- 1 rectangle 13.5 x 72” (Scarf Body)
- 4 rectangles 5.5” x 23” (Ruffles)
- Roll hemmer foot
- General all purpose foot
- Matching thread and bobbin thread
- Machine needle to match fabric
- Optional: Ruffler foot for cotton voile works well.
Techniques:
- French Seam
- Narrow rolled hem
- Ruffles
Cutting the fabric may be done on top of tissue paper using a rotary cutter. Use fabric weights to keep things from shifting. Alternatively, you can tear the fabric to the needed sizes
Directions
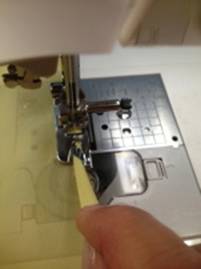
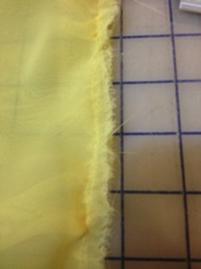
Use the roll hemmer foot and create a narrow rolled hem on one side of each smaller rectangle along the length
|
|
Rolled Hem: This method may differ from the directions that came with your presser foot. Try both methods and use what works best. Working with one long side of each of the 4 rectangles: Place a piece of “stitch and tear paper” over the feed dogs to prevent the fabric from being sucked into the bobbin as you begin the hemming process. A one inch square of paper is perfect.
Fold the beginning fabric edge twice to a scant 1/8”. Finger press about 1 inch of fabric. Place the folded edge under the presser foot. Drop the needle down and lock the stitch. Take 3-4 stitches. Now use the right hand with the fabric folded once and gently pull the fabric upward. |
|
As you stitch, keep the fabric at an angle at the mouth of the foot. You will see the fabric feed along the guide forming a beautiful rolled hem.
Press each of the hems and remove any wispy threads, if needed for all four rectangles.
Tip: if your fabric frays easily, trim 6 inches at a time as you are stitching. |
|
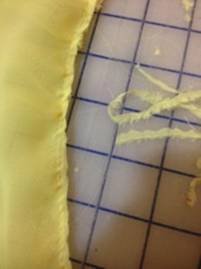
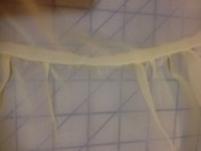
Baste the opposite long raw edge either with two rows of basting stitches or use a zigzag set to 4.0 length and 2.5 max width.
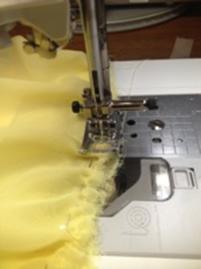
Pull the basting thread tails to match ruffle to the 13.5” side of the large rectangle. Do this step with Wrong Sides facing each other. Machine baste ruffle to scarf. Press.
   |
|
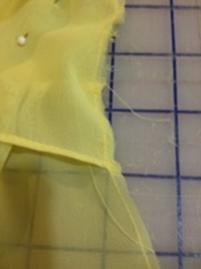
Trim seam down to 1/8 inch seam |
|
Refold the fabric to encase the seam, right sides together. Press and Stitch using a 1/4 inch seam. Press finished French Seam. |

|
Repeat procedure on other side. |
|
Optional: add second layer ruffle 3” apart on each end. Stitch with Right Sides together on right side of fabric. |
|
Match the ruffle short edge with the edge of the long rectangle and baste ruffle 1/8” from the edge to hold in place.
Finish hemming the two remaining long sides of the scarf either by hand or use the narrow roll hemmer foot. Chiffon is light, and will work with the narrow hemmer foot including the ruffle layer. |
|
Additional Notes:
Basic Techniques for scarf seams and edges.
Audition the intended fabric by taking a sample piece and try marking, cutting, stitching and pressing it. This rehearsal will help you choose the best type of hem and seams needed for a professional finish.
Cutting tips: Consider using weights, tape and/or silk pins for sheer fabrics. You can cut your fabric over tissue paper as one unit. Lay your fabric out completely on the sewing table and let it relax for an hour. Cut the fabric in a single layer when possible to avoid fabric shifting. Rotary cutters make it easier to cut without fabric shifting then scissors.
Sewing Tips: Using a straight stitch needle plate helps fabric from being pulled into the bobbin area when sewing straight stitches on sheer fabric. Use a lock stitch rather than a back stitch when sewing on sheer fabrics. If not an option on your machine, le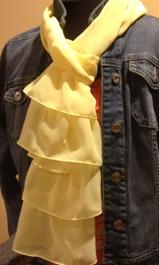 ave long tails at the beginning and end of stitching. Hand stitch the knot ends with the long tails. Use threads that match the weight of the fabric. Fine rayon embroidery, extra fine silk, light weight cottons are wonderful choices. ave long tails at the beginning and end of stitching. Hand stitch the knot ends with the long tails. Use threads that match the weight of the fabric. Fine rayon embroidery, extra fine silk, light weight cottons are wonderful choices.
If scarf has fabric cut on the bias, zig zag stitches work best in most instances. Gently guide your fabric. Let the machine do the work to avoid stretching seams. Depending on the fabric, you may be able to steam the shape back into a seamed area.
The French seam: encloses the seam neatly and used for shear fabrics. Wonderful for piecing sections of fabric together for creating a long rectangular scarf.
Place wrong sides of fabric together and stitch a one-quarter inch seam.
Press to lock stitches, and press again to one side to make the next step simple.
Trim to one-eighth of an inch.
Fold the seam with right sides together. Stitch one-quarter inch seam from the folded edge.
Press to lock stitches, open and press again.
Machine Hemmed Edges - you should select the type of finished edging based on the fabric stability and amount of durability needed.
Preparation for Machine Stitching: Press the fabric hem area flat first. Fold one quarter inch under and press, repeat one quarter inch fold and press, again.
Narrow Roll Hemmer - Stitch in place with a narrow roll hemmer foot. The foot rolls the right side of the fabric toward the wrong side of the fabric, and the straight stitch secures the roll in place. Start by rolling an inch worth of fabric into a tight rolled hem. Place the fabric wrong side facing up under the foot and position the rolled hemmer as shown.
Start by adding a few stitches to secure the hand rolled hem and then positioning the fabric into the foot. Guide the fabric to keep the roll edge positioned correctly at the front of the foot to keep it feeding in properly.
Zig Zag over the edge, creatively accomplished to resemble a serger finish. Set machine to a small zig zag 2.0 to 3.0 depending on fabric. Set the length between .5mm to 6.0mm. Placing watersoluble stabilizer under the edge will prevent stretch and provide a prettier finish. Rinse away once completed.
Straight Stitch: Use a general purpose or one quarter inch foot and straight stitch one quarter inch away from raw edge of the fabric. Press flat to lock stitches into the fabric. Fold hem, wrong sides together on line of stitching and press. Repeat one quarter inch fold for seam allowance. On wrong side of fabric, place edge foot guide along the fold, move needle to the right one to two positions to the right and straight stitch seam.
Hand Sewn Finished Edges
Rolled Hem: Using a whipstitch and hiding the long thread jumps in the tunnel fold of the fabric.
Twitter: twitter.com/cookiegaynor
Enjoy fun projects on Facebook: facebook.com/cookiescreationswebsite
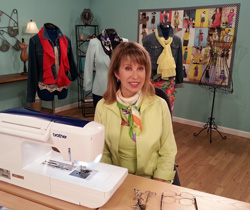
Sewing Machine Featured in this Segment:
Brother Quattro 3 – 6750D - Sewing, Quilting, Crafting and Embroidery Sewing Machine

|