Using a Multi Needle Machine with Cutwork to precut appliqué pieces – Cindy Hogan

Materials needed:
PR 650/1000 series with PE-DESIGN NEXT + CW upgrade installed
8 x 8 or larger embroidery frame
2 10 x 10 inch pieces of background fabric (red was used in this lesson)
1 5 x7 inch piece of black fabric with adhesive
2 10 x 7 inch pieces folded and pressed in half to measure 10 x 3 ½ inches
Embroidery thread to match the project
Little black dress checkbook cover design
Tear away stabilizer
Instructions:
- In the software change the appliqué design’s cut line color to Applique Material. Usually when there aren’t multiple parts it will be the first stitch in the design. This design has been color sorted so the dress cut section is segment 3.
- Save the design and send it to the machine.
- Reorder the design so that the segment embroiders first.
- Turn on cutwork mode on the machine and then restart the machine.
- Place a stop in the machine after the dress segments for each of the last two embroidery portions.
- Hoop a piece of Tear away stabilizer. Place the black fabric with the iron on (double sided) adhesive stabilizer adhered on top of the stabilizer.
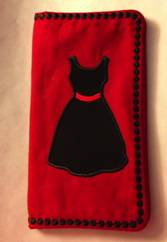
- Embroider the first segment (these are the dresses).
- Remove the embroidery from the machine when it is complete and back up the design to the beginning.
- Hoop a piece of Tear-away stabilizer in the 8x8 or 8x12, or 8x14 inch hoop.
- Lay one of the red fabric squares on top of the stabilizer.
- Do a trace to make sure the fabric is within the embroidery area. If necessary shift the fabric.
- Fast forward to segment two of the embroidery design.
- Begin the embroidery. The machine will stop after the placement line for the dress.
- Remove the hoop from the embroidery machine, place the dress inside the placement line and touch the iron to it to tack it to the fabric.
- Return to the embroidery machine and finish the dress.
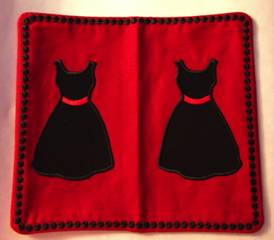
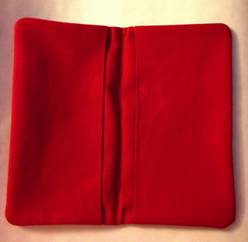
- Place the two 7 x10 inch pieces long ways across the top of the 2 dresses and tape into place. These will form the pockets for the checkbook.
- After this has stitched, place the last 10 x 10 inch square over the entire design and finish stitching. Taping it into place is a good idea.
- Remove from the machine and hoop, tear the stabilizer away, trim the outer edge to a quarter inch on all sides and turn right side out and press.
If you do not have a multi needle machine with cutwork, you may print out the templates by copying the cutting segment into another design window. Turn the template upside down and trace to the back side of the adhesive backed stabilizer paper after it has been ironed onto the fabric and then manually cut.
You may also cut the fabric as usual after the appliqué fabric has been tacked onto the project, cut the outer edge of the appliqué away.
For more information visit www.cynthiasembroidery.com .
Little Black Dress Checkbook Cover – Cindy Hogan
Materials needed
PR 650/1000 series with PE-DESIGN NEXT + CW upgrade installed
8 x 8 or larger embroidery frame
2 10 x 10 inch pieces of background fabric (red was used in this lesson)
1 5 x7 inch piece of black fabric with adhesive
2 10 x 7 inch pieces folded and pressed in half to measure 10 x 3 ½ inches
Embroidery thread to match the project
Little black dress checkbook cover design
Tear away stabilizer
Instructions:
- Open Layout and Editing.
- Click on the Design Settings icon and place a dot in front of the multi-needle machine. Change the hoop size to 8x8in or 200x200 mm and click OK.
- Click on the Import Patterns icon and choose from File.
- Scroll to the bottom of the list and locate the folder on the computer where you saved this lesson’s files.
- Click OK.
- Select the little black dress checkbook cover design and then click Import.
- To change the appliqué design to cut when it is used on a PR that has been upgraded to Cutwork, in the Sewing Order window, click on the stitch that would be the cutline. Usually when there aren’t multiple parts it will be the first stitch in the design. This design has been color sorted so the dress cut section is segment 3.
- In the Integrated Sewing Attributes window, click on the Color Tab.
- At the bottom of the window, there are 3 appliqué color buttons. The first one will code a PR when in cutwork to cut the segment.
- If you want the PR to stop after each appliqué step, without having to do the set up stops on the PR, you can change the other segments to the different appliqué colors. You may switch back and forth between the two remaining colors. Just do not apply appliqué material as a color for any other segments.
- In the Sewing Order window, reorder the design to where the appliqué material pieces embroider first.
- Save the design and send it to the machine via USB media (or your preferred method).
- At the Machine, place the cutwork needles in the first 4 needle bars according to the directions.
- Turn on the cutwork mode. Turn off the machine and restart it to start the machine in cutwork mode.
- Bring up the checkbook cover design.
- Place a stop in the machine after the dress segments for each of the last two embroidery portions.
- Hoop a piece of Tear away stabilizer. Place the black fabric with the iron on (double sided) adhesive stabilizer adhered on top of the stabilizer.
- Embroider the first segment (these are the dresses).
- Remove the embroidery from the machine when it is complete and back up the design to the beginning.
- Hoop a piece of Tear-away stabilizer in the 8x8 or 8x12, or 8x14 inch hoop.
- Lay one of the red fabric squares on top of the stabilizer.
- Do a trace to make sure the fabric is within the embroidery area. If necessary shift the fabric.
- Fast forward to segment two of the embroidery design.
- Begin the embroidery. The machine will stop after the placement line for the dress.
- Remove the hoop from the embroidery machine, place the dress inside the placement line and touch the iron to it to tack it to the fabric.
- Return to the embroidery machine and finish the dress.
- Place the two 7 x10 inch pieces long ways across the top of the 2 dresses and tape into place. These will form the pockets for the checkbook.
- After this has stitched, place the last 10 x 10 inch square over the entire design and finish stitching. Taping it into place is a good idea.
- Remove from the machine and hoop, tear the stabilizer away, trim the outer edge to a quarter inch on all sides and turn right side out and press.
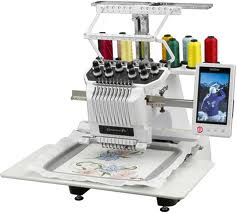
Sewing Machine Featured in this Segment:
Brother Entrepreneur® Pro PR-1000e
|